Text, Lessons and Topics
Pages of text as graphics
As authors we know that it helps when we can treat text as a graphic item. You can learn to do this too.
Therefore we do our best to: –
- Write short pages with short lines
- Leave plenty of white space
- Use simple fonts in large sizes
Now and again we: –
- Add emphasis by formatting words and phrases in italics and bold
- Make use of bulleted lists and mind maps
- Use images where these will help
- Show extra material (mainly explanations) in footnotes – this works well to keep the core messages clean and yet it takes a little effort to get used to using footnotes (consider this a Scholar Skill)
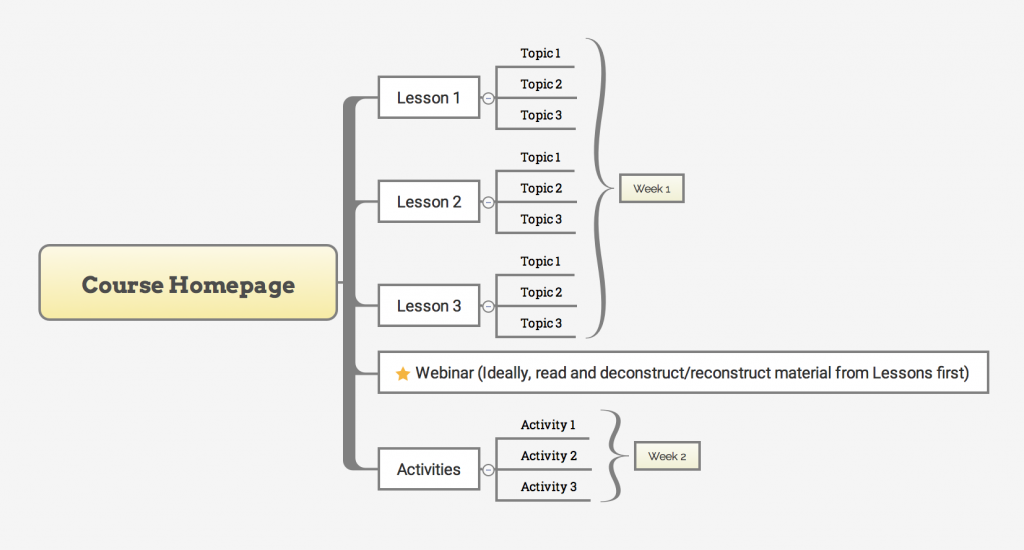
Then we assemble a number of ‘text as a graphic’ pages into short ‘Topics’, which are grouped into ‘Lessons’. Each Lesson is designed to be read in a single sitting.
The final Lesson in each course is a series of Activities. The nature of these activities will depend on the particular course.
Understanding this basic pattern will help you to plan how you will progress through the course content, leaving yourself ample time and space to deconstruct and reconstruct the material (which we’ll talk about more on the following pages).
It is also worth noting here that each Course is 2 weeks long – after the first week (half-way through), there is a live webinar where we will come together to talk about the material.
The following graphic will help you visualize the pattern (# of Lessons/Topics/Activities will vary):

