Outside of adding your photos, videos and language to your portfolio, one way to personalize your portfolio and each of the pages in your collection is to create a “skin”. A skin is a color/font/background template that you can apply to one page or multiple pages. If you do not wish to create a skin for your portfolio, that is perfectly fine, but this is one way to imprint your personality to your portfolio reviewer. You can create as many skins as you want to display in your portfolio, but each page can only have one skin. Below are instructions on how to create and apply skins to your portfolio.
- At the top right main menu bar, under “Create”, click on “Skins”
- Click the button for “Create Skin”
- Give your Skin a title that matches the vibe you intend to relay
- You can make your skin private, or allow for others to use it.
- Click “Save” before navigating to the “Page” tab at the top.
- This is where you can choose the color palette. You’ll notice that there’s a header background color and a page background color, feel free to play around with the color palette to find the right hues for your skin. You could also choose to insert a background image here.
- Click “Save” before navigating to the “text” tab at the top (for some, you might be kicked back to the skins menu and will have to select the new skin you created).
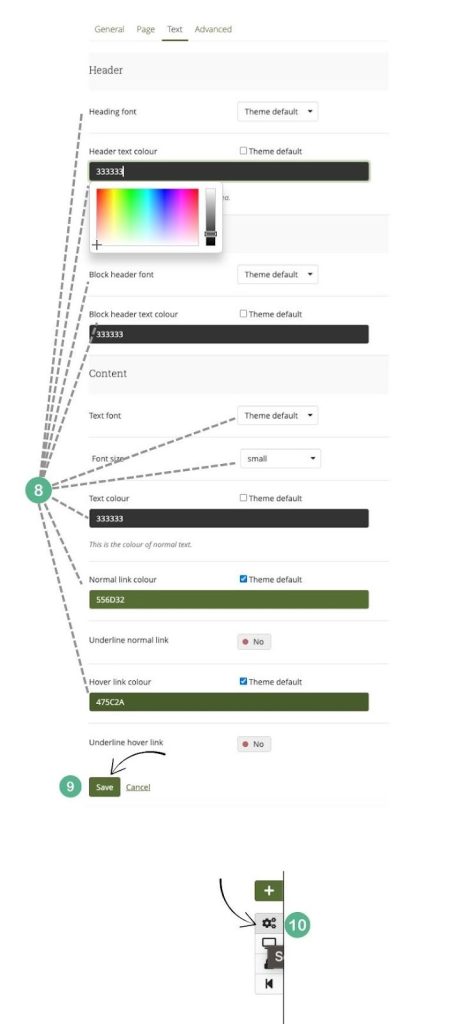
- Under the “Text” tab, you can change the header font and color, the page content font, color, and size, and even the link colors.
- Click “Save” before exiting out (don’t worry about the Advanced tab at the top).
- To apply your skin, navigate to the page you want to apply the skin to and get into the editing mode. Click on the gear icon on the top right hand side.
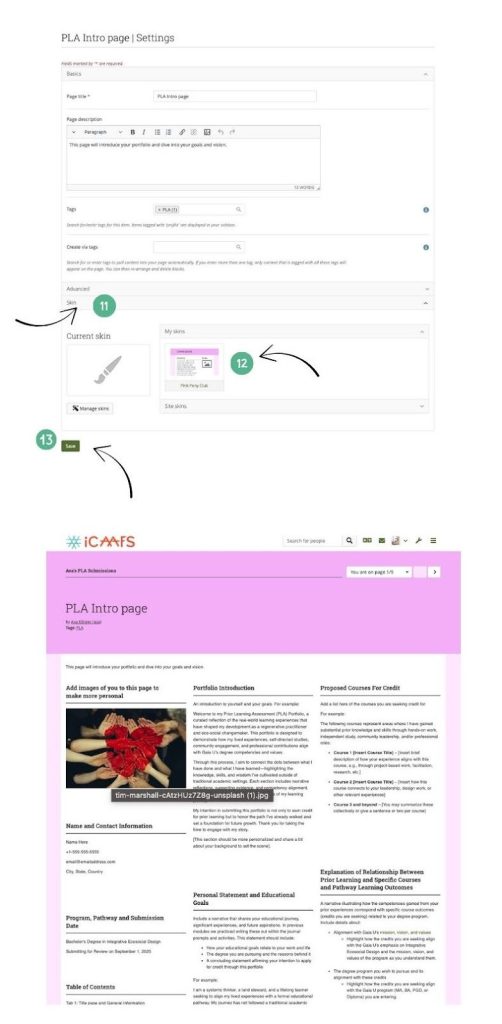
- Click “Skins”
- Select the skin you wish to use for this page.
- Click “Save”. You will have to navigate out of the page editor to view your skin.