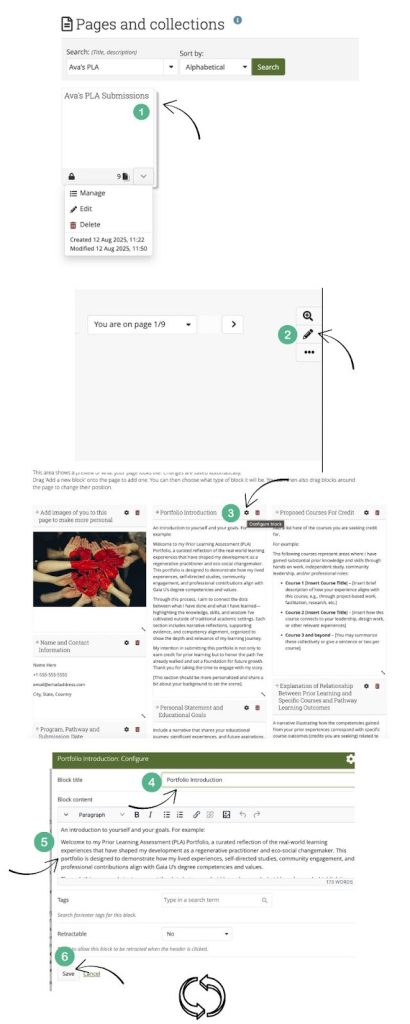
Now that your collection is set up, the next step is to begin editing each page so it reflects your unique learning journey. Collections are built from “blocks” of content—these blocks can include text, images, and other multimedia. By editing these blocks, you will add in the material you’ve prepared from your PLA work, customize images, and ensure each page is complete. The instructions below will walk you through how to edit both text and image blocks so your collection is polished and ready for review.
- Search for the collection you just copied in “Pages and Collections” and click on the title of the collection at the top.
- Once you are in the first page, click on the pencil icon on the top right hand side of the window to edit the page.
- Each page is made up of several “blocks”. Some blocks have text, others have photos and there are more types of blocks where you can add different multimedia (more on this in section 5). To edit a block, click on the gear icon next to each block.
- This opens up a separate window for you to add your content. First you can rename the block title (optional).
- Next you can copy and paste the material for each section from the text you created in Module 6 of the PLA.
- You will have to click “save” before exiting each block, or your content will not be saved. Repeat the steps above for each block on each page of the collection.
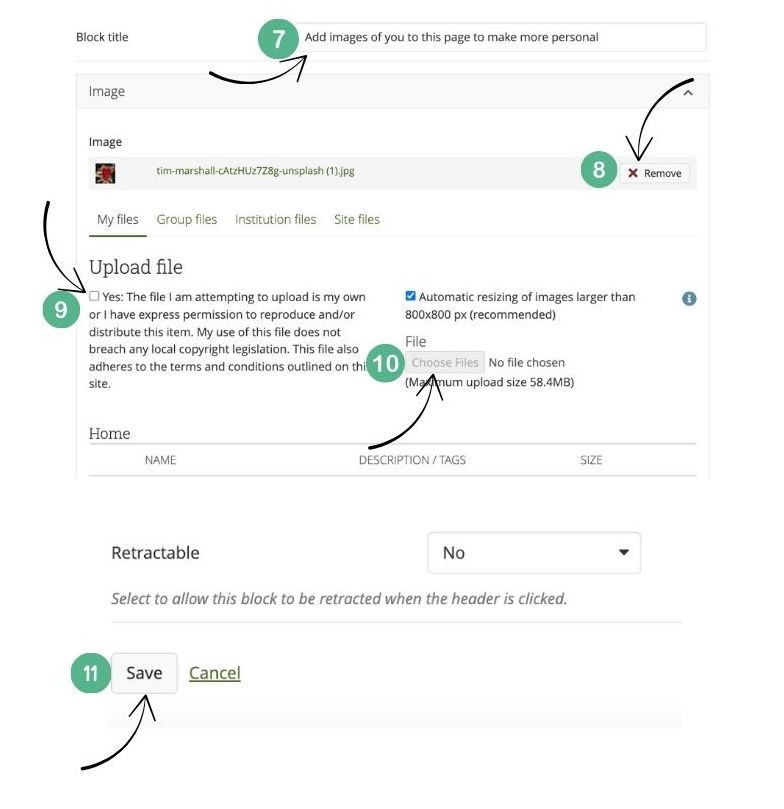
- For images, click on the gear icon next to the image block then add a title for your image.
- Click remove next to the existing image.
- Tick the box next to “yes”
- Click “Choose file” and upload the image you want to put in there.
- Click “Save” before exiting the window.